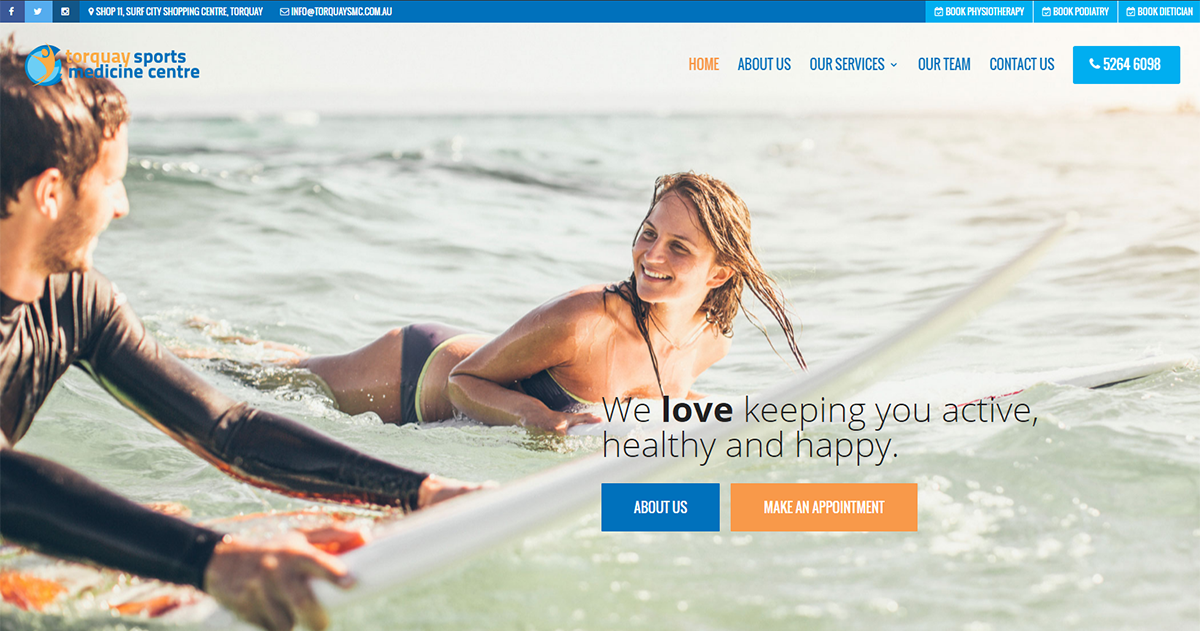
Divi’s secondary menu is great for displaying important information to your site’s visitors. I use this layout on a lot of sites, recently on Torquay Sports Medicine Centre’s site I used it to make sure that contact details and booking information are easy to find at the top of the page.
If you want to use icons in the menu like I have on torquaysmc.com.au you’ll need to download the excellent Menu Icons plugin. Once youv’e got it installed it adds a option to each menu item in Appearance > Menu. From there you can add icons from different icon font repositories, change the size and location of the icons and hide the menu item’s label.
You’ll also need to be able to add a CSS class to individual menu items. WordPress handles this by default but it’s sometimes hidden. Go to Appearance > Menus and click the “Screen Options” tab at the top right. Make sure “Show advanced menu properties > CSS Classes” is checked. Once that’s checked you’ll see a “CSS Classes (optional)” option under each menu item.
Next you’ll need to add the following CSS to your site. You can add it to Divi’s Theme Options under “Custom CSS” or add it to your child theme’s style.css file. Because Divi moves the secondary menu items into the mobile menu on smaller screens we’ll add a media query to only apply these settings to larger screens.
Once you’ve added the CSS you can start adding CSS Classes to menu items to change how they look.
‘left‘ – This class will align the menu item to the left of screen.
‘facebook‘, ‘twitter‘, ‘instagram‘ – These classes will apply the correct backgrond colour to the menu item for each social media network.
‘cta‘ – This class will turn the menu item into a call to action button.
Here’s the CSS:
[css]
/* Divi secondary menu customisations by Yates Design */
@media (min-width: 980px) {
#top-header .container {padding: 0 !important;}
#et-secondary-menu {float: none;}
#et-secondary-nav li {margin-right: 0;}
#et-secondary-nav li a {padding: 0.75em 1em;}
#et-secondary-nav {width: 100%;text-align: right;}
/* Add the class'left' to any menu item to float it to the left of the menu */
#et-secondary-nav li.left {float: left;}
/* Add the class 'facebook' to any menu item to give it Facebook's background colour */
#et-secondary-nav li.facebook {background: #3b5998;}
/* Add the class 'twitter' to any menu item to give it Twitter's background colour */
#et-secondary-nav li.twitter {background: #55acee;}
/* Add the class 'instagram' to any menu item to give it Instagram's background colour */
#et-secondary-nav li.instagram {background: #125688;}
/* Add the class 'cta' to any menu item to turn it into a Call to Action button */
#et-secondary-nav li.cta {background: #f8994a;}
}
[/css]
That’s it! I’d love to hear about any successes or failures you have with this. Email me at hello@yatesdesign.com.au.
Thanks for reading!
If you found this post helpful you can show your appreciation by leaving a review on my Google Business listing.
If you need help…
I am available for hire! No matter how big or small your project is, I’d love to hear about it. All quotes are obligation free.